How to Use YNAB for Your Small Business

Budgeting is budgeting, but budgeting for your small business is just different enough from personal budgeting that it may feel like you need to go out and buy small business budgeting software and learn a whole new platform and routine to keep track of your business finances.
As a small business owner, the last thing you need is to spend more money on yet another budgeting solution or to take the time to learn a whole new budgeting tool. There’s comfort in the confidence that comes with your existing budgeting process (unless you don’t have one yet…yikes. It’s okay, we can fix that).
But what might surprise you is that I’ve used YNAB for both personal budgeting and managing finances for a small business.
So, flash back to the day that I landed my first client as a freelance writer. It was a thrilling and somewhat overwhelming moment—I’d labored (for what felt like forever) to set up my website and figure out where to meet potential clients. Bookkeeping? Definitely not on my radar.
Could I Use YNAB as Business Budgeting Software?
I researched accounting software like Quickbooks, FreshBooks and Xero, but with a single client, I couldn’t justify “investing” in pricey business budgeting software systems. Still, I knew that budget planning and tracking my income were critical to my long term success (Hello, tax season!) and wondered, “Can I get away with just using YNAB?”
I already had YNAB for my personal finance budget, why not use it as my small business budgeting software? So that’s what I did. This will work great for you, too, if you:
- Run a simple service-based business
- Don’t need to manage employee payroll
- Don’t manage a ton of inventory
The benefits of using YNAB as small business budgeting software include:
- User friendly
- Expense tracking
- Financial data reports
- Making spending decisions based on real time data
- Managing accounts receivable
- Tracking, managing, and paying off business-related credit card debt
- Mobile app and cloud-based software means your budget is available anywhere at any time.
And here’s how it works:
1. Create Your Business Budget
If you already use YNAB, log in. If you don’t, grab a free trial and check it out!
Once you’re logged in, click the name of your personal budget (“My Budget”) which is on the top, left-hand corner of the screen. Then select “New Budget” from the dropdown menu. It looks like this:
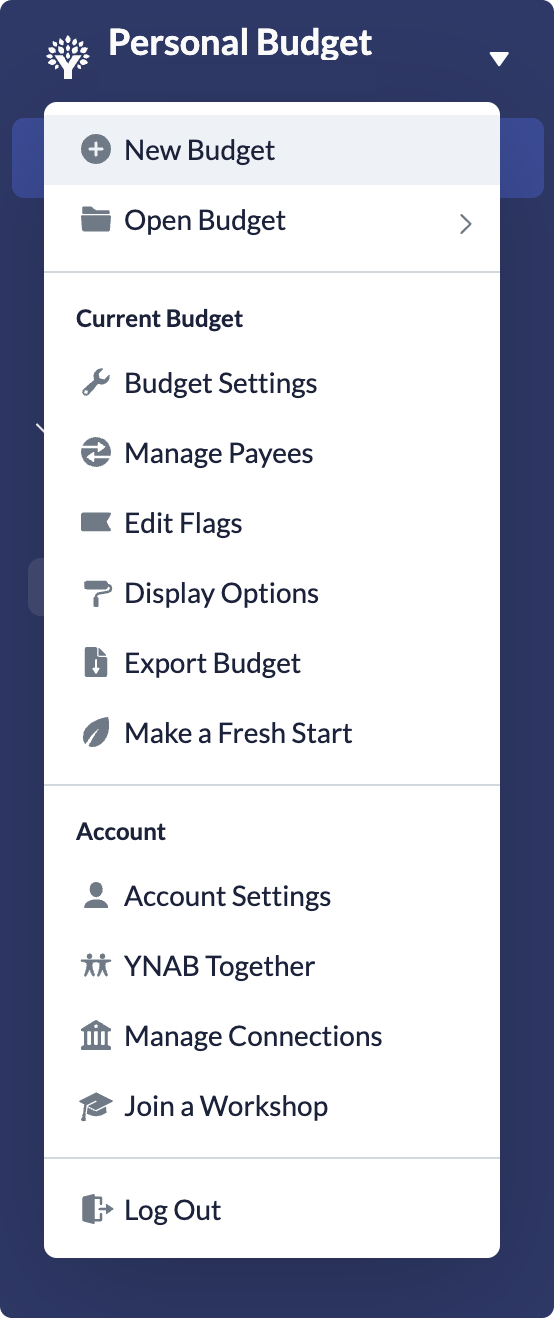
Enter your business budget’s information (name, starting balance, etc.), and click “Create Budget.”
2. Create Your Categories
Next, create category groups and categories. As you can see, I’ve used category groups to separate savings and different types of expenses:
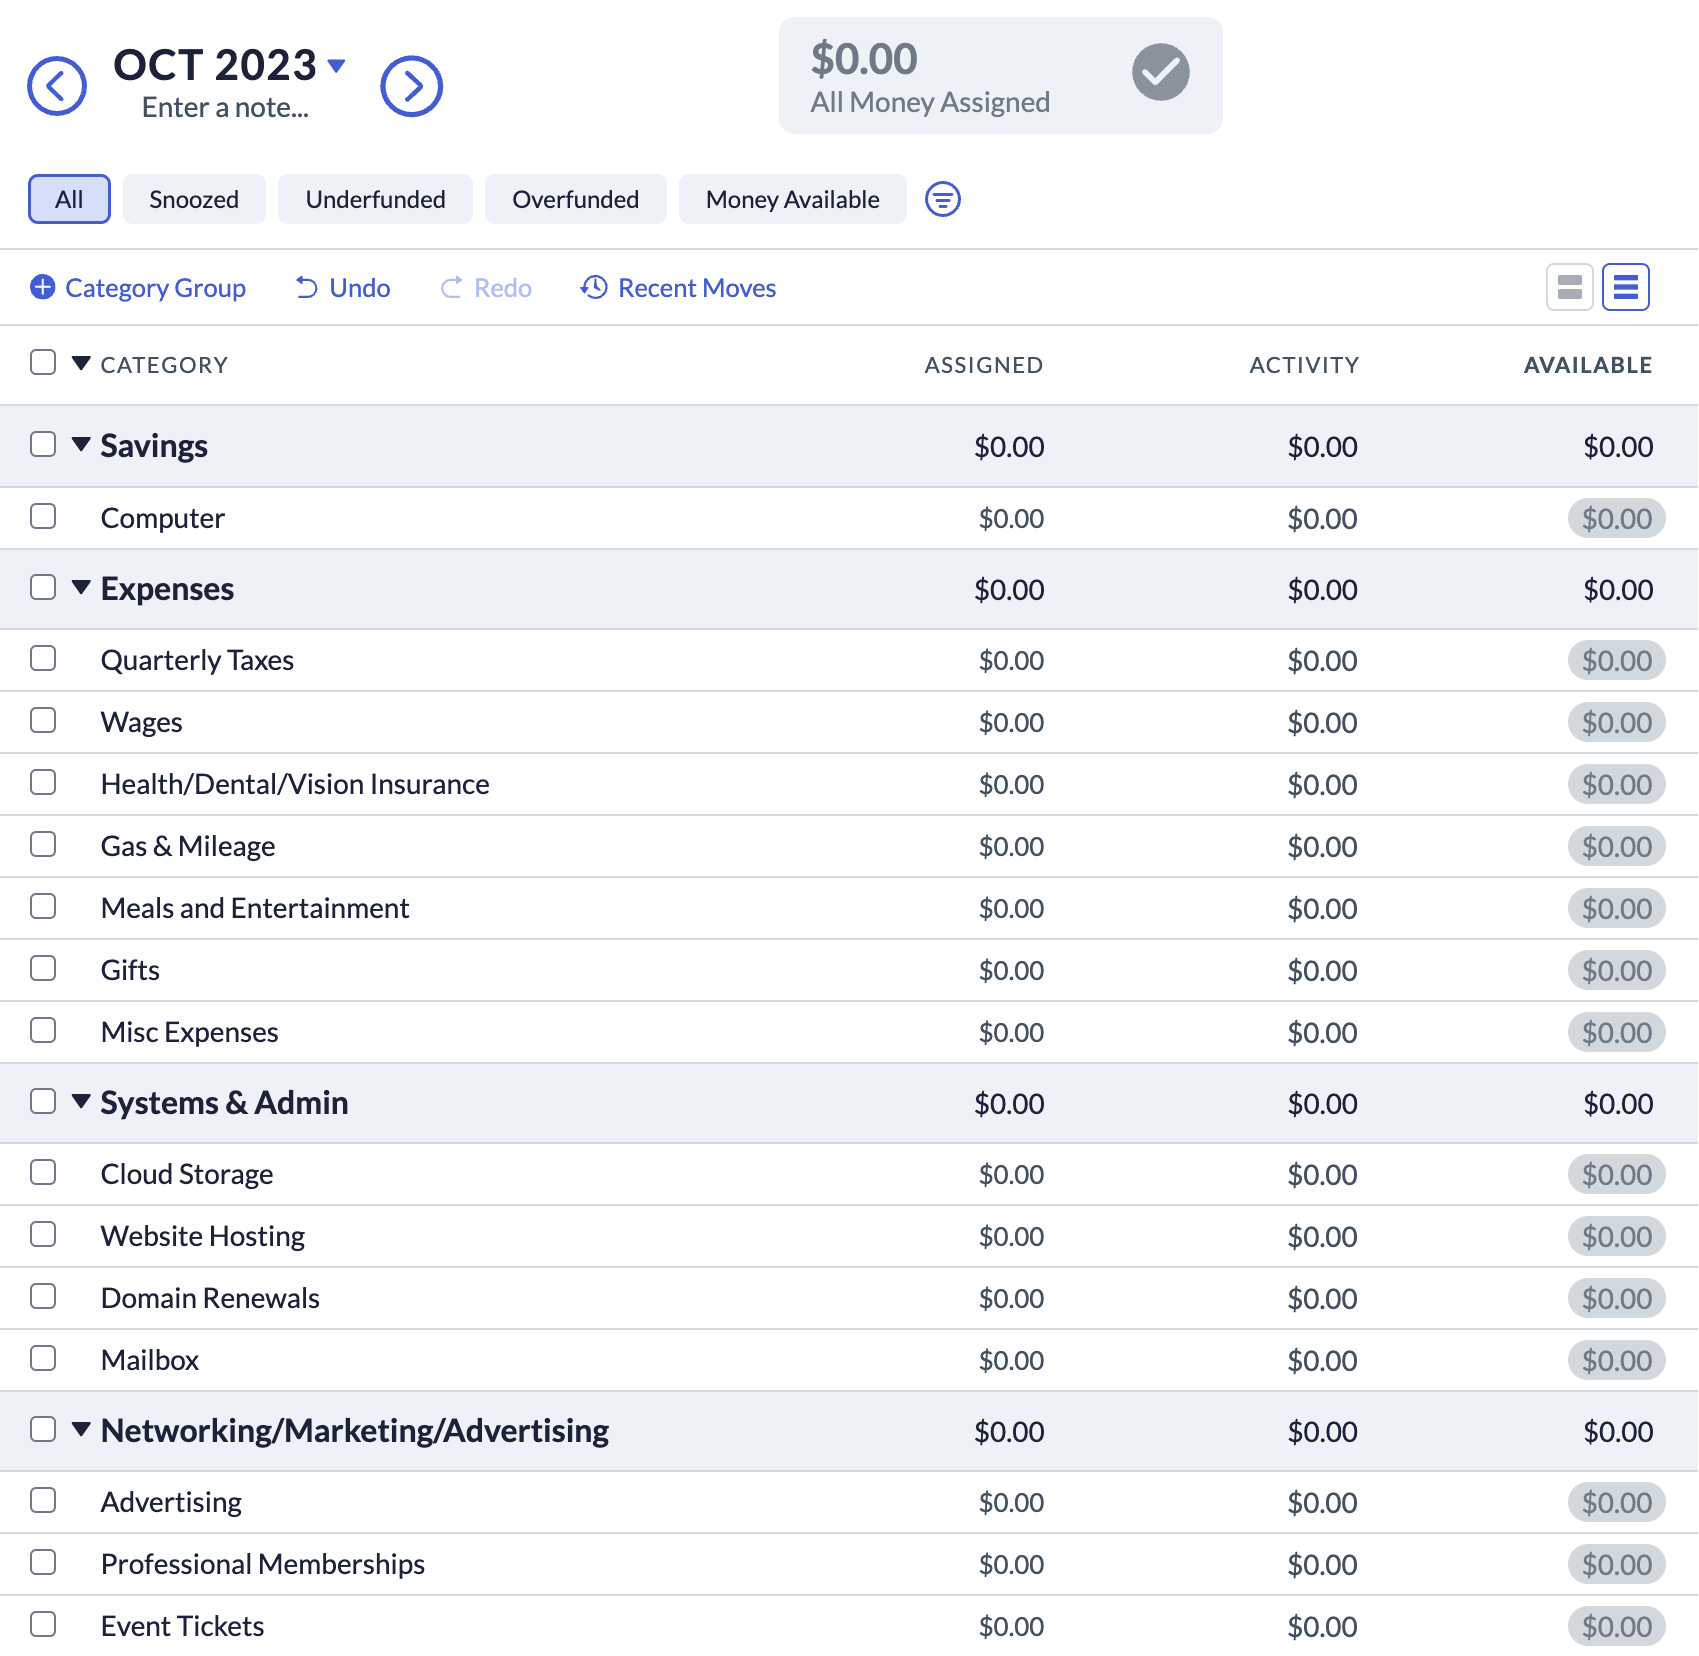
Customize your categories to suit your business. You can always edit and add to your category list later, too.
3. Create a Tracking Account
Now, the best part: Accounts Receivable! (That’s the money that your clients owe you for the services that you provide.)
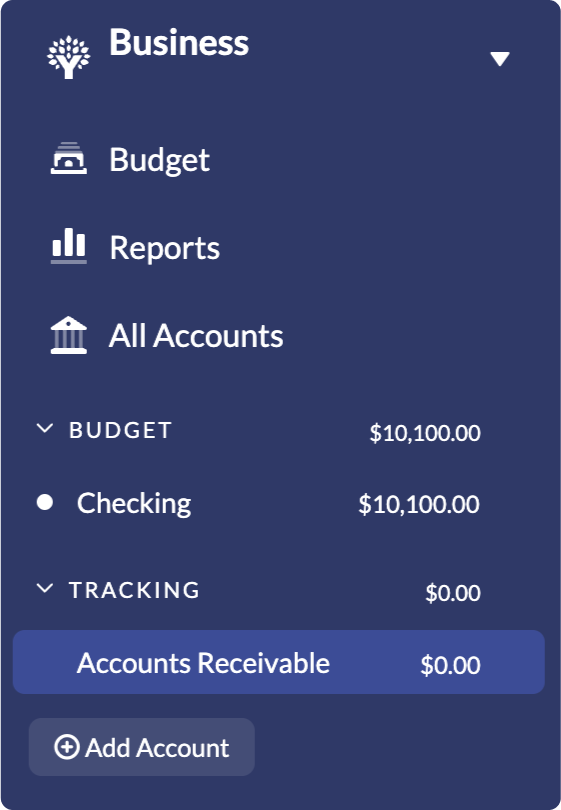
Click “Add Account” on the left sidebar. Select Unlinked and choose the Asset account type. Enter “Accounts Receivable” for the name, and “0” for the balance.
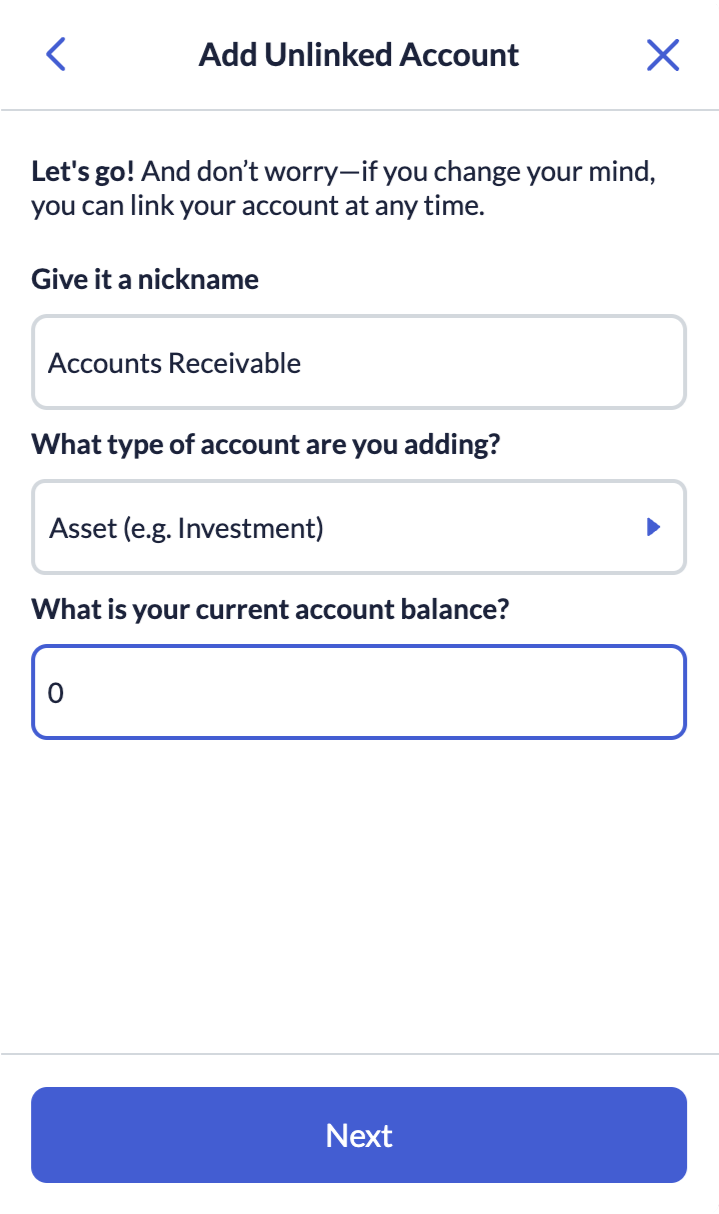
Add Accounts Receivable as a tracking account so that you can keep track of any unpaid invoices.
Congratulations, now you’re officially ready to get paid. (I don’t know about you, but that’s my favorite part!)
4. Record Your Invoices
Record your invoices in your new Accounts Receivable account by adding a transaction with the date, client name, invoice number and amount billed.
For example, if you billed J. Doe on November 3rd for $1,500, it would look like this:

Pro tip: Always include the unique invoice number in your memo line. This is super important for records and reconciling.
As you can see, the inflow of $1,500 is reflected in the updated Accounts Receivable balance—which went from $0 to $1,500. Whenever you need to know how much you’re owed, consult your Accounts Receivable balance.
(Note that nothing has changed in the budget because you haven’t received J. Doe’s payment, yet.)
5. Reconcile When You Get Paid
Flash forward, and J. Doe has paid your invoice. Nice! Let’s move the transaction to the receiving budget account by selecting it and clicking “Edit” then “Move to Account”.
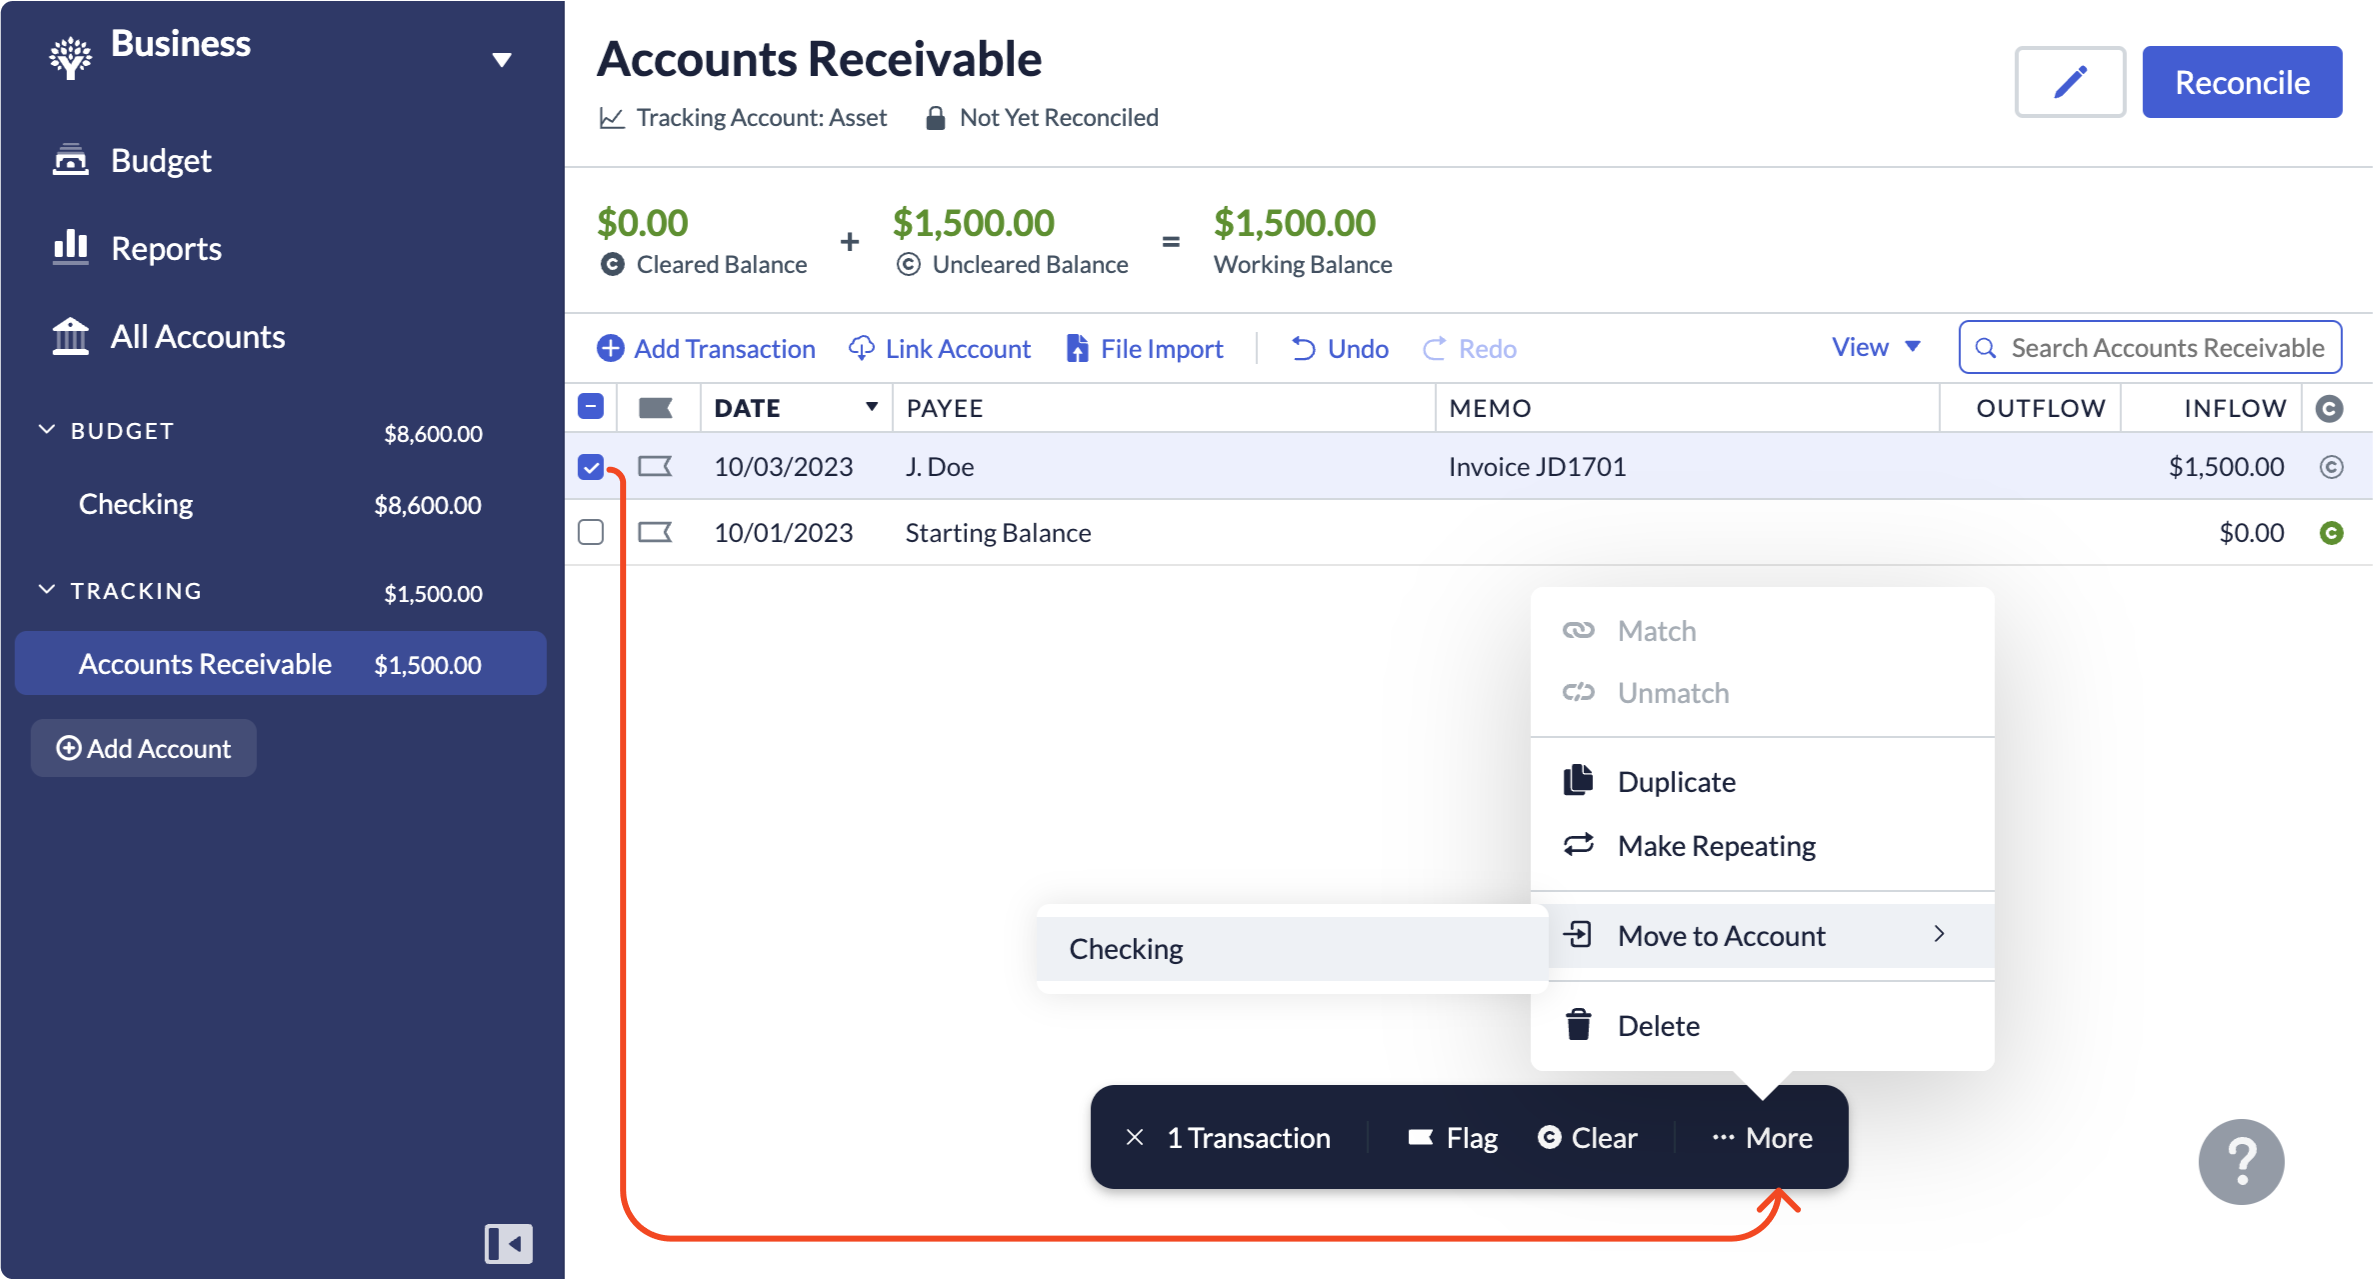
Notice that your Accounts Receivable balance is updated. That means that all of your invoices are paid in full (Yay!) and nobody owes you money (Oh!).
When you click over to your bank account, you’ll see that J. Doe’s payment has been added as a line item in your bank register. Categorize the transaction as Inflow: Ready to Assign.
We recommend retaining the invoice date and memo on the transaction so they match your records.

Congratulations, you’ve got cash!
6. Time to Give Your Dollars Jobs!
Back in the budget screen, you’ll see that your $1,500 is ready to be budgeted. Now, just like with your personal budget, give every dollar a job! You can also apply a basic budget template.

Your funds are now ready to be assigned to categories.
That’s a Wrap!
If you offer freelance services or run a small to medium sized business that is suited for this type of bookkeeping, I hope this helps! It’ll only take you minutes to set up, and it’s so worth the benefits:
- You’ll have a running tab of how much business you’ve invoiced—in other words, how much money your clients owe you—so that none of your payments slip through the cracks.
- You’ll have clear financial reporting records for tax filing and other business purposes.
- You won’t have to pay for business accounting software.
- You won’t have to reinvent the wheel by learning a new budget management tool while you’re busy running a business.
And, if you have questions about YNAB, make sure to drop into our free online workshops. They’re only 20 minutes long, and our teachers would be thrilled to answer your questions.

.svg)
.png)


.avif)


